
FPlusScheduler Documentation
Schedule post in the group on facebook - FPlusScheduler
SCHEDULE POST IN THE GROUP – FPLUSSCHEDULER
FPlusSchedule help you schedule post in the group facebook. You can selections of post, get post from page and manage group realtime.
FPlusScheduler > Group Realtime
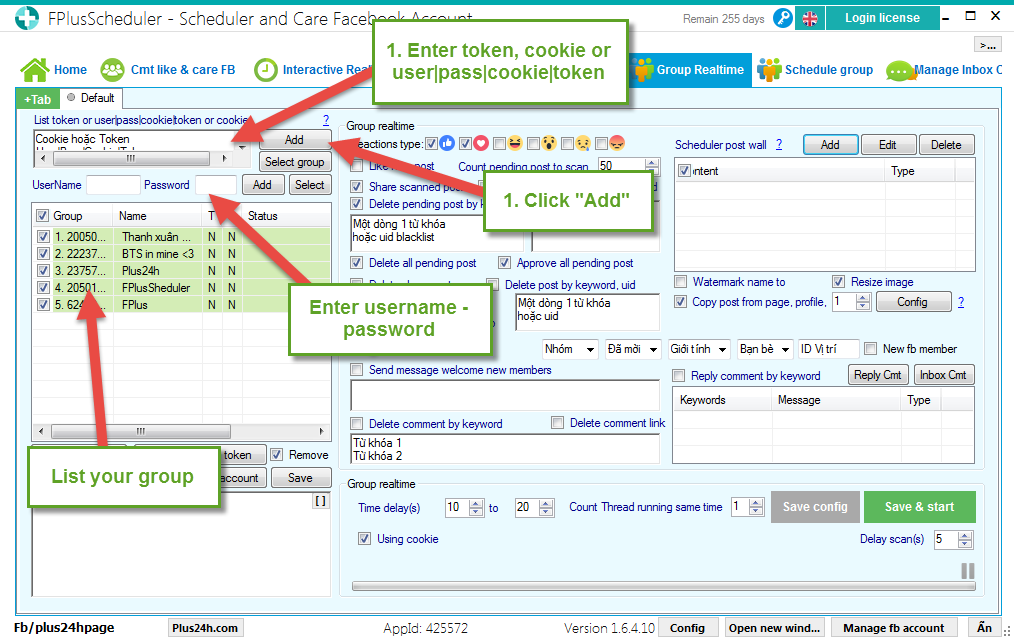
Step 1: Add account.
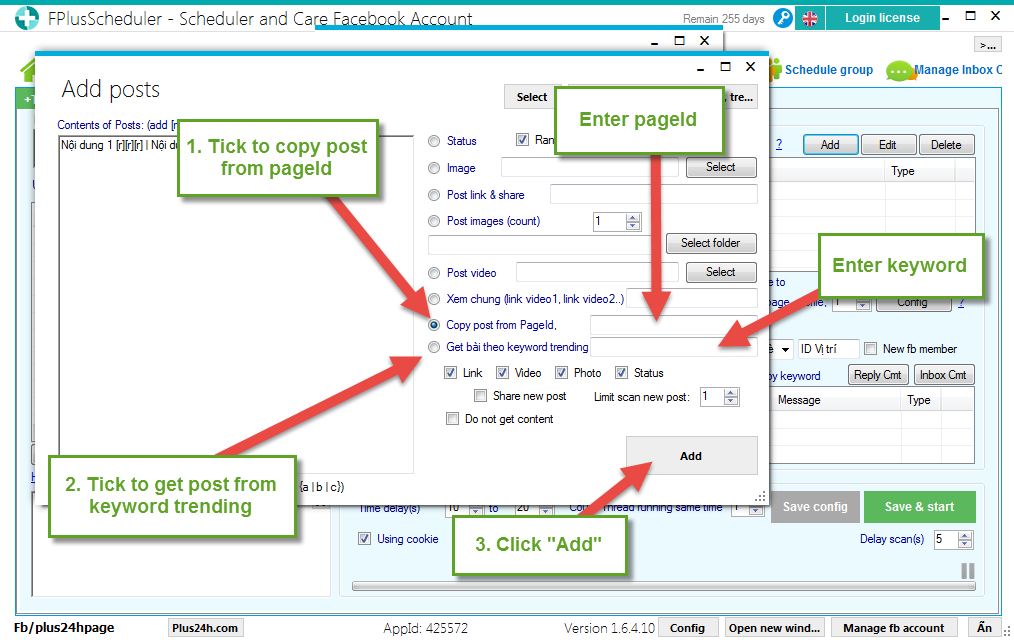
Step 2: Add posts.

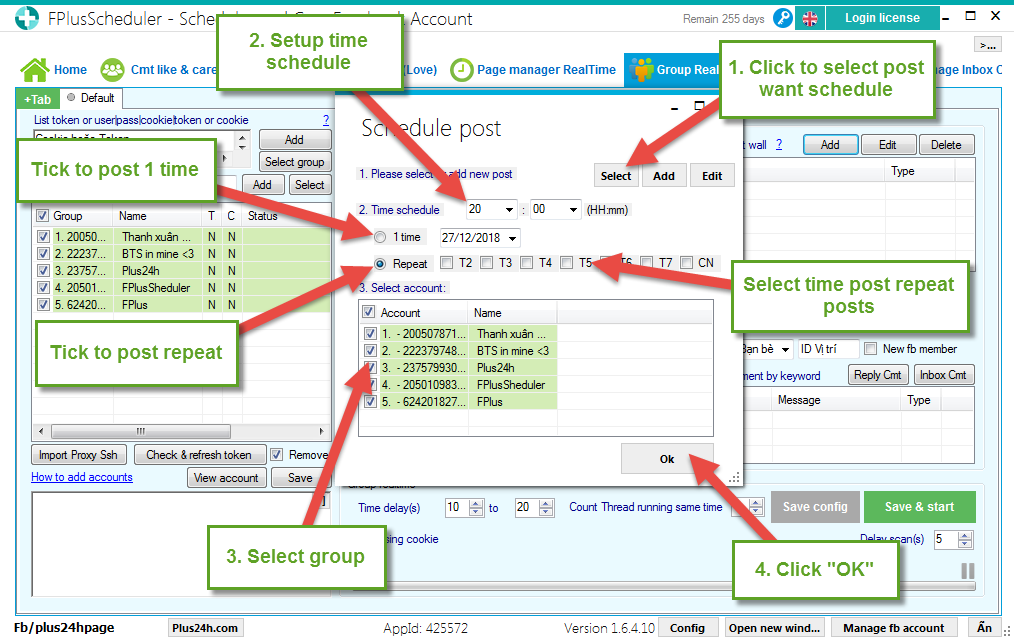
Step 3: Schedule post.
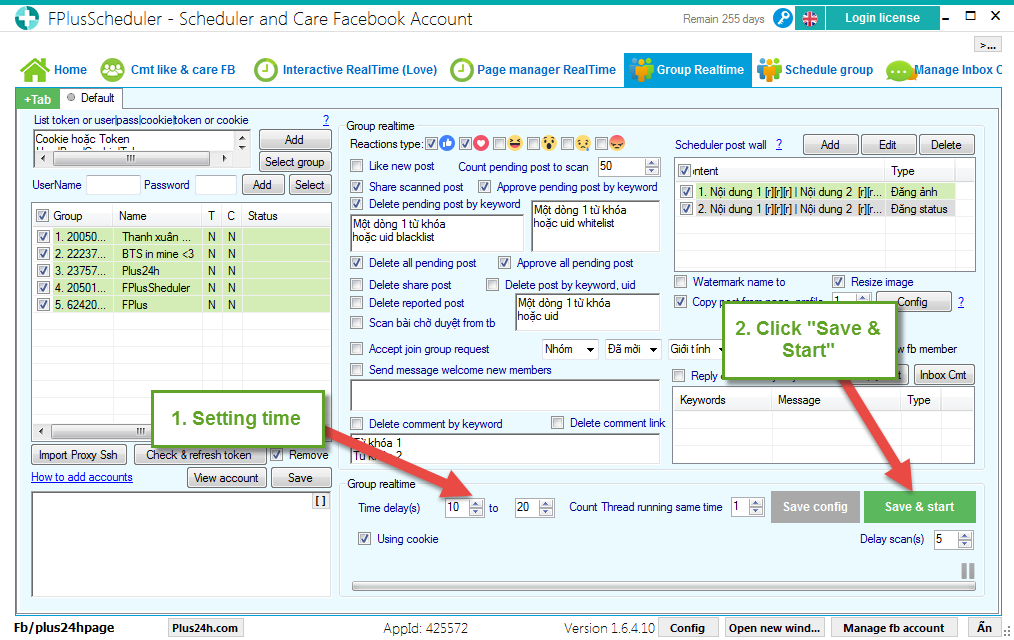
Step 4: Setting time and click “Save & start”.
FPlusSchedule help you schedule post in the group facebook. You can selections of post, get post from page and manage group realtime.
FPlusScheduler > Group Realtime
Step 1: Add account.
- Enter cookie.
- Enter token.
- Enter user|pass|cookie|token.
- Click “Ad”.
- Or enter username – password.
Step 2: Add posts.
- Click “Add” to open tab Schedule post.
- Click “Add” to add posts.
- Enter contents of posts.
- Selections of posts.
- Tick to copy post from pageid. Enter pageid.
- Tick to get posts from keyword trending. Enter keyword.
- Click “Add”
Step 3: Schedule post.
- Click to select post want schedule.
- Setup time schedule.
- Select group.
- Click “OK”.
Step 4: Setting time and click “Save & start”.